Understanding how to iron beads is essential for crafting enthusiasts. This technique, popular among hobbyists and those new to the art, can turn simple beads into stunning artworks.
This article offers a thorough explanation of the process, ensuring that even those unfamiliar with the craft can achieve excellent results.
The Basics of How Iron Beads Work
Before we embark on the actual ironing procedure, it’s beneficial to grasp the fundamental concept of how iron beads work.
These tiny, colorful beads are constructed of a special thermoplastic material designed to melt when subjected to a certain amount of heat.
The melting process allows the beads to fuse or bond with their adjacent counterparts, solidifying your intricate designs into a singular, cohesive piece.
Imagine drawing with colored pencils, but instead of sketching on paper, you’re creating with beads that can be melded together.
Materials Needed:
Embarking on your bead ironing project requires a few essential materials. These materials are readily available at craft stores or online retailers. Here’s a list of what you’ll need:
- Beads: Available in an array of colors, choose beads that fit your envisioned design. Remember, quality matters. Opt for beads from recognized brands to ensure consistent melting.
- An iron: A regular household iron will do the trick. It doesn’t need to be fancy, but it should have adjustable temperature settings.
- Pegboard: This is a special board filled with pegs where you’ll place your beads to form your design. These come in various sizes, depending on the complexity of your project.
- Ironing paper or parchment paper: This barrier ensures your beads don’t stick to the iron, maintaining both your design and your appliance.
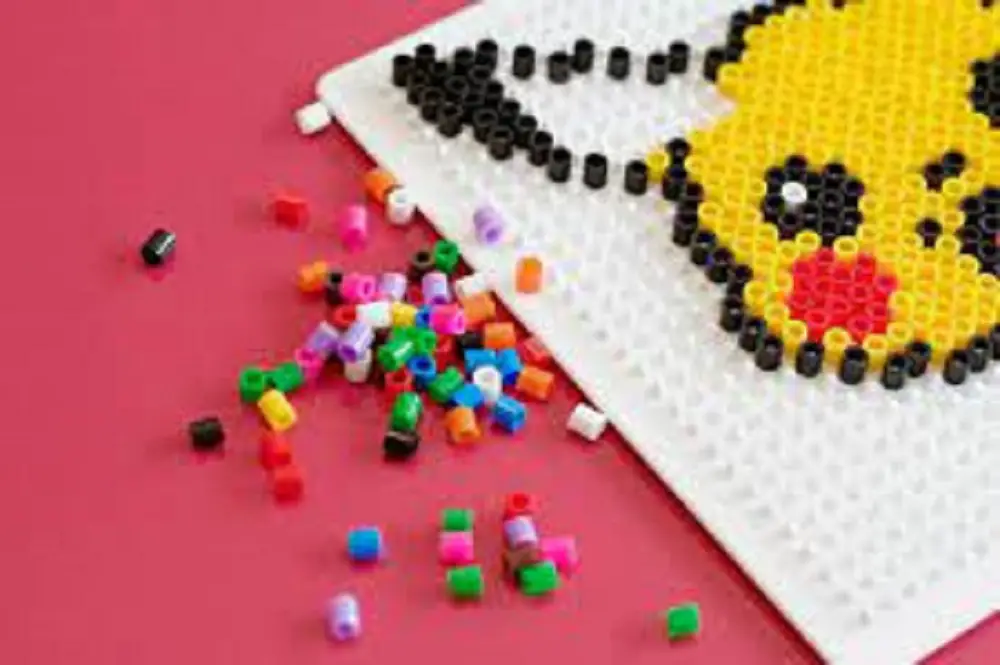
Step 1: Lay Out Your Design
Initiate your project by positioning your beads onto the pegboard. Before you start, visualize or sketch your desired design. The idea is to place each bead onto its corresponding peg, ensuring it’s secure and doesn’t topple over. Take your time with this step – the beauty of the final product depends on the precision of your layout.
Step 2: Preheat the Iron
With your design in place, it’s time to preheat your iron. Set it to a medium setting, ensuring even and consistent heat distribution.
It’s paramount to remember to turn off the steam function – introducing steam to this process can adversely affect the bead’s melting and fusing properties.
Step 3: Cover the Beads
Before introducing the iron to your beads, overlay your design with ironing or parchment paper.
This sheet acts as a protective barrier, safeguarding your beads from direct contact with the iron. It also ensures the beads melt uniformly, preserving the integrity of your design.
If you want to read more articles like this one click here – How to Iron: Easy Guide to Mastering the Art of Ironing
Step 4: Iron the Beads
Gently press the preheated iron onto the protective paper, using small circular motions. Consistency is key; move the iron steadily across the surface for about 10-20 seconds.
Periodically lift the paper to check the beads. They should appear slightly fused without being overly flattened or distorted. If some beads haven’t melted sufficiently, re-cover and iron a bit longer.
Step 5: Let Cool and Remove
Upon achieving the desired fused effect, set your design aside to cool. As the beads solidify, they bond even more securely.
After a few minutes, your artwork should be ready. Gently detach it from the pegboard, and voilà – your bead masterpiece is complete!
Tips and Tricks for a Flawless Finish
While the steps above offer a basic understanding of how to iron beads, refining your technique can lead to even more impressive outcomes. Here are some advanced tips to elevate your bead ironing game:
- Even Pressure: When ironing, ensure you apply consistent pressure across your design. This will help in even melting, preventing certain sections from becoming too flat or others not fusing adequately.
- Test First: Especially when using a new brand of beads or a different iron, do a test run with a few beads to see how they react to the heat and how long it takes for optimal fusion.
- Stay Patient: It’s tempting to rush the process, especially when you’re excited to see the finished product. However, hurrying can lead to mistakes. If you’re not satisfied with the fusion after the initial ironing, you can always go back and iron a bit more. Remember, less is more.
- Cooling Under Weight: After ironing, placing a heavy book or flat weight on your design helps it cool flat, reducing any chances of curling.
- Creative Exploration: Don’t limit yourself to preset designs. Let your creativity flow. Experiment with colors, patterns, and shapes. The possibilities are endless.
Maintaining Your Bead Creations
Now that you’ve mastered how to iron beads, it’s essential to understand how to maintain and care for your creations. Keep them away from direct sunlight to prevent colors from fading.
Also, avoid exposing them to excessive heat after they’re made, as they can still melt or deform. Store larger pieces flat and ensure smaller creations like keychains aren’t subjected to too much force or pressure.
How to Iron Beads: Conclusion
Mastering how to iron beads can open up a world of crafting possibilities. From intricate designs to simple patterns, the potential is vast.
With this guide at your side, even the most complex projects become feasible. Remember, patience and practice are your allies in this art. Happy crafting!