
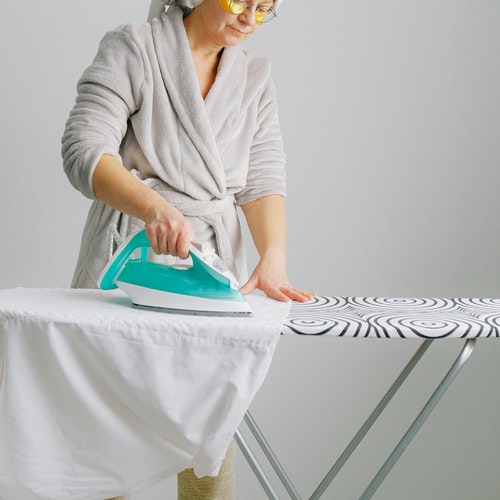
How hard can it be to use an ironing board? Everyone knows that you just lay whatever cloth you want to iron on it, plug in your pressing iron, and iron away, right? Wrong.
Ironing boards have been in existence for many years and are useful items in most homes. But some people still do not know how to use it to iron clothes properly, especially when it comes to different types and styles of clothes.
When your ironing board is used the wrong way, your ironing process could become more time-consuming and difficult. More so, you could end up getting unwanted creases on your clothes and/or hurting yourself.
Maybe you have not always had an ironing board at home and you just bought one, or are planning to. That is the more reason to know how to use it; in order to maximize the functions fully and avoid mistakes.
Keep reading to know how to use an ironing board properly.
What are the Steps to Take Before Setting Up an Ironing Board?
Before you set up an ironing board, consider the following factors:
1. The type of ironing board to be set up.
2. The location to set up the board.
3. The height to adjust the ironing board to.
4. The direction to face the ironing board.
Type of Ironing Board
In order to use your ironing board, you need to set it up first, and your set up and positioning depends on the type of ironing board you use.
What are the types of ironing board?
Here are the types of ironing board:
1. Freestanding ironing board.
2. Built-in ironing board.
3. Hanging ironing board.
4. Table-top ironing board.
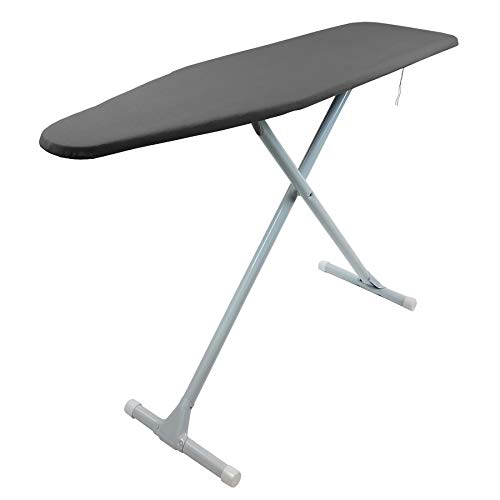
Freestanding Ironing Board
What is a freestanding ironing board?
A freestanding ironing board is a stand-alone type which can be placed anywhere in your space with the support of the legs. Some of them have retractable legs, to enhance storage and mobility, and adjustable heights.
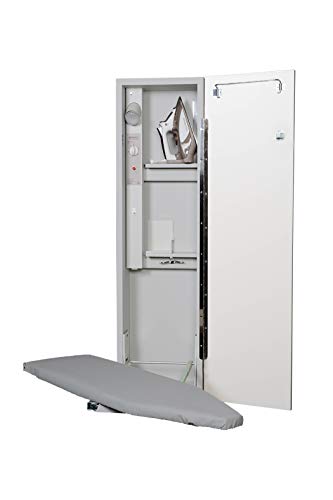
Built-in Ironing Board
What is a built-in ironing board?
A built-in ironing board is one that can be attached to a component in the home like a cabinet, counter, wall or drawer. It is easy to fold up and is great for homes that do not have enough space.
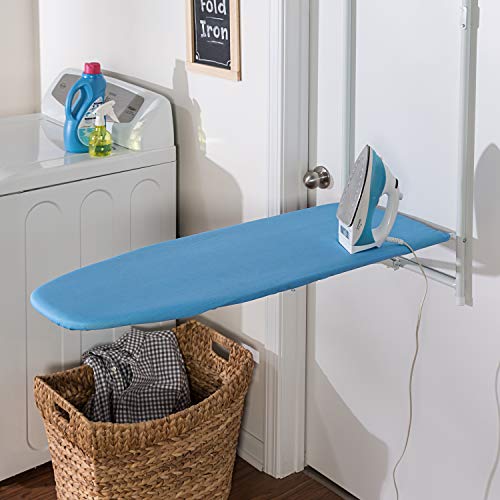
Hanging Ironing Board
What is a hanging ironing board?
This board, as the name implies, is hung over a supporting structure, usually a door and secured in place with an ironing board hanger. The ironing surface is also foldable. They can be removed from the hanger and used as a freestanding ironing board.
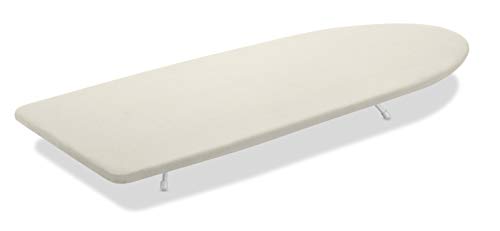
Tabletop Ironing Board
What is a tabletop ironing board?
This is a type of ironing board that can be placed on any flat surface such as the floor or tabletop. This type of ironing board is great for those who need a board that can be moved around a lot as it is very compact and lightweight.
Location
What is the best location to set up an ironing board?
The best location to set up an ironing board is close to the power outlet. This way, you do not have to stretch the cord of your iron too far, which could damage it. The location you choose should also allow you to move your iron around the ironing board without stress. Whether moveable or not, your ironing board must also be firm and stable and should be placed where you have good lighting and ventilation.
You need to put these into consideration especially for built-in and hanging types which cannot be easily moved once installed.
Height
What height can you set an ironing board before use?
Your ironing board should be at your hip level, so you don’t have to bend over or reach uncomfortably high to iron. Most ironing boards have a good range of height adjustment options that support different positions. Always set the height of the ironing board to the hip level whether seated or standing.
Trying to get wrinkles out of your clothes should not result in getting aches on your back and neck muscles.
The Direction of the Nose
What direction can the nose of the ironing board face?
A typical ironing board has a broad end and a curved end (nose). The direction to face the nose of your ironing board depends on your dominant hand and how convenient it would be.
If you are right-handed, the nose should face your left hand side and vice versa. The iron rest will be close to your right when you face the nose to the left.
How Can You Set Up Your Ironing Board?
Here’s how to set up an ironing board:
1. Place the board on a firm, flat surface.
2. Extend the legs carefully and place gently on the firm surface.
3. Adjust the height as needed.
4. If the cover is not in place, slip it on the ironing surface and secure it firmly.
If you want to use a built-in/hanging iron board that is folded up, open it up and straighten carefully.
Now you’re all set for ironing.
Essential Items for Ironing
What are the essential items for ironing?
The essential items needed for ironing are:
1. A good quality iron.
2. Spray bottle and water.
3. Spray starch.
4. Hangers.
5. Pressing cloth.
A Good Quality Iron
It must be clean to prevent staining your clothes and should glide easily over your clothes. Try to get one with safety features and easy temperature adjustments.

Spray Bottle and Water
A spray bottle is used for dampening your cloth to get the wrinkles out easier and faster. It offers more coverage than your spray iron, which only sprays water from the nozzle in front of it.
You can also add some sweet-smelling essential oils to give a nice fragrance to your clothes. If you are doing this, play it safe by spraying the insides of your clothes, to prevent possible oil stains.
Spray starch
This is optional but you need it if you are ironing shirts and you want them to be very crisp.
 Professional Iron Spray Starch for Clothes & Fabric - No Stick Iron Spray, No Flaking or Clogging")
Hangers
They are used to hang your freshly ironed clothes and prevent re-wrinkling. Plastic hangers are better than metallic hangers because they will not rust over time.
Pressing cloth
What is a pressing cloth?
A pressing cloth is a piece of fabric that protects your clothes from gloss and scorch marks. It is most useful on fabrics that should not be ironed directly such as wool and silk. A pressing cloth is also necessary for clothes that require a damp cloth placed over them to generate steam.
Pressing cloths are sold in most local stores. But you can also use a towel, preferably white, to avoid color transfer, or an old cloth, preferably linen, which allows steam to pass through easily.
Useful Ironing Tips for You
Not all clothes are ironed the same way even though the goal of ironing is to remove creases.
In the next section, we will give you tips on how to iron certain pieces of clothing the right way.
How to Iron a Shirt
How can you iron a shirt?
To iron a shirt, do the following:
1. Lay your shirt flat out on the ironing board and open the cuffs and collar.
2. Start by ironing the sleeves first, then work your way through the other parts of the shirt. This works best because the sleeves hang down straight after ironing, giving it time to cool and set without disturbance, while you iron the other parts.
3. The cuffs and collar should be ironed flat. Be careful with the front area, so you don’t pop or melt your buttons. Iron carefully in between them.
4. Once done, allow to hang for a few minutes, to let the heat dissipate and the ironing set in properly.
If you iron the body of the shirt first and iron the sleeves last, the other parts you have ironed before could get wrinkled again.
How to Iron A Skirt or Dress
How can you iron a skirt or dress?
To iron a skirt or dress, do the following:
1. Straighten out your dress or skirt on the ironing board.
2. For dresses, start ironing from the collar, then towards the sleeves and down to the rest of the dress. For skirts, start from the top and iron downwards.
3. Allow to cool down for a few minutes.
How to Iron Pants
How can you iron pants?
To iron your pant, do the following:
1. Fold your pants lengthwise on the ironing board, making sure to match the side creases. If you cannot find the creases anymore, simply align the side seams of the two legs together.
2. Iron the whole length upwards till about 6 inches below the waistband, applying gentle pressure as you go.
3. Place on a hanger and allow to cool down and set for about 1 to 2 hours.
How to Iron Pleats and Ruffles
Some shirts, skirts, and dresses come with ruffles and pleats, which require some extra care when ironing to avoid straightening them out.
We recommend that you iron the opposite side of the garment to maintain the ruffled and pleated details, especially tiny ones.
Video: How to Iron Ruffles
Watch this video to learn how to iron ruffles.
For more ironing tips, check these articles:
- How to Iron Without an Ironing Board — A Guide
- How to Get Wrinkles Out of Curtains Without Ironing
- How to Close an Ironing Board with Broken Lever
- How to Get Wrinkles Out of Polyester Tablecloths Without Ironing
- How to Remove Ironing Stains from Clothes
- How to Wash Dress Shirts Without Ironing
Quick Recap
Ironing boards are commonly used in many homes, but some do not know how to use one properly. It is important to know in order to maximize the functions and make ironing easier and more effective.
Using an ironing board the right way starts with proper setting up and positioning, which depends on the type of ironing board you own. While setting up, attention must be paid to the location, height adjustment, and direction the curved end is facing, to make for easy usage and effectiveness.
Once settled, you can then use it to iron different types of clothes like shirts, skirts, dresses, and pants.
Now that you know how to use an ironing board, go ahead and do so like a pro!
How To Use An Ironing Board Like a Pro — Related FAQs
How Do You Iron Like A Pro?
To iron like a pro, follow these procedures:
1. Study the instructions on a garment first and set the iron to the correct temperature for its fabric type.
2. Sort clothes by their fabric types so that you do not have to adjust the ironing temperature every time you start ironing a garment.
3. Start with clothes that require low temperatures first. This way, you will not scorch your cloth with a hotter iron before the temperature fully adjusts.
4. Start ironing a shirt from the sleeves since they hang loose while other parts are being ironed. Then iron the collar and the body of the shirt.
5. When you finish ironing a garment, hang it alone until it cools down before you hang it near other garments. Creases can easily form on a garment when it is still warm.
How Do You Hang A Shirt on An Ironing Board?
Some ironing boards have some features that allow you to hang your ironed clothes on them. This feature is known as the hanger bay.
To find out if your ironing board has the hanger bay, lift the wider end of your ironing board and check for rows of thin metal rods that can be pulled out.
The hanger bay and clothes rack are attached to the ironing board to prevent you from moving back and forth while ironing. It also provides a place to hang your ironed shirts without worrying about stains.
Can You Put an Ironing Board in The Bin?
You can put an ironing board in the bin. But before disposing of it, you have to break or dismantle it into smaller parts.
If your ironing board is made of wood, you can use it as fuel or for other decorative purposes in your home. If it is made of metal, you can recycle it or sell it at a metal scrap store.
The ironing board cover and batting can be removed and disposed of in the bin before taking the ironing board frame for recycling.
How Do You Hang an Ironing Board?
To hang an ironing board, you will need a hook. You can get the ironing board hanger hook on Amazon or from a local hardware store. You can use screws or nails to hold the hooks firmly to a wall or door.
Fold your ironing board and hang the leg stand of the board on the hooks. If your ironing board is heavy, hang the board on the wider end of the board. If your board is light, you can hang it on any end you choose.
Why Are My Shirts Still Wrinkled After Ironing?
The following are the reasons your shirts are still wrinkled after ironing:
1. Your shirts were completely dried before you ironed them. Wrinkles are harder to remove from dry clothes than from damp clothes.
2. You ironed your shirt with a lower temperature than required. Heat helps to remove wrinkles and achieve a perfect result in ironing.
3. You put too many clothes in the cloth dryer. This caused the clothes to squeeze up, forming wrinkles. These wrinkles are then set by the heat of the cloth dryer.
How Do You Dry Clothes So They Don’t Need Ironing?
If you are using a cloth dryer, do not put a lot of clothes in the dryer at once. When your clothes are almost dry, remove them from the dryer.
While the clothes are still warm, smoothen them on a flat surface and hang them up immediately. Piling them up until they get cold will cause the wrinkles on them to set.
If you are drying your clothes using a line, do not throw them over the line. Instead, hold the tips of your clothes to the line using a clothing peg. Remember to avoid wringing your clothes after washing. Flap the clothes instead to get rid of the excess moisture.