Ever wondered how to make an ironing board cover from scratch? You’re in the right place.
As you might well know, an ironing board cover is an essential part of the ironing board, as it serves as a buffer between the ironing surface of the board and your clothes.
What is the importance of the ironing board cover?
The importance of the ironing board cover are:
1. The ironing board cover helps to prevent scorch marks, stains, and imprints from the board.
2. It reflects heat away from your clothes and allows friction-free ironing, leading to a smooth and effective ironing experience.
3. The ironing board covers collect the stains, dust, and dirt that would have otherwise gathered on the board surface directly, which would be difficult to get out.
4. Apart from the protective function, iron board covers also provide some aesthetic value, as they are also a great way to liven up your ironing space, with the myriads of patterns and color options available on the market.
Imagine trying to wash these off the padded ironing surface, it would be quite difficult and it can even take a toll on the padding and adhesive material. A board cover, on the other hand, is easy to slip off, wash, dry, and slip back on to the board.
How long does an ironing board cover last?
A good ironing board cover should last up to 2 years with careful use and regular maintenance. After some time, they can get permanently stained, torn, and/or worn out, which warrants a change.
You could even get bored of seeing the same pattern and color every time you need to iron and would like to have another cover or even a number of ironing board covers on hand to switch things up, according to your mood. If you sew regularly, you understand what we mean here.
What if you just got a new ironing board, but you do not like the cover that comes with it and would like to change it by making one for yourself?
Maybe you just don’t like having to wait for the cover you washed to dry before getting started on your ironing tasks for the day. Or you just want to try creating something by yourself.
Well, we feel you and we have got you covered in this article, whether you want to learn how to make a DIY ironing board cover just to challenge yourself, as a cool DIY project, and/or to revamp and liven up your ironing space to fit your personality.
Once you get the hang of it in this post, we assure you that you will be able to make an iron board cover or even lots of ironing board covers, if you so wish.
What are the Materials Required to Make an Ironing Board?
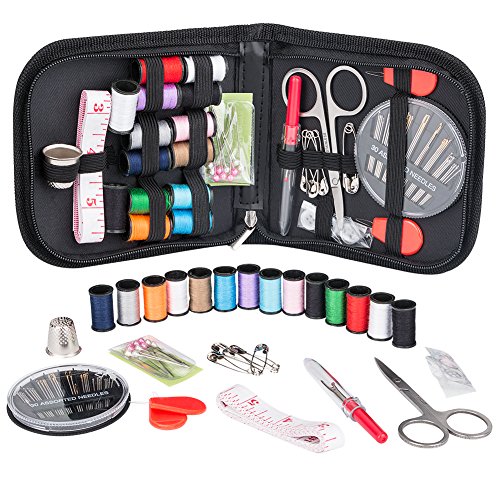
Here are the things you will need to make an ironing board:
1. Pattern tracing paper: This is used to create the pattern for the DIY ironing board cover.
2. Cover Fabric: This cover material is the star of the show and it must be heat, stain, and water-resistant.
3. Elastic cord or drawstring cord with a stopper: This is to make the ironing board cover well fitted and secure in place.
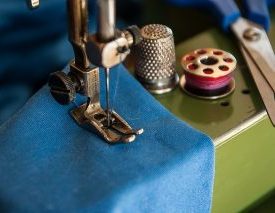
4. Sewing machine or needle and thread: These are for sewing the edges of the cover fabric.
5. Scissors: This is used to cut out the pattern, fabric, and other materials as necessary
6. Pins: They are used to hold the materials in place before cutting or sewing.
7. Measuring tape and marker: These are necessary to make the right measurements and mark out points.
Before you set about making a DIY ironing board cover, you need to make sure that you have all the necessary supplies.
Most of these materials are stuff you most likely have around at home already. If not, they are easy to get at your local supply store or you can order online.
The cover fabric for your board should also be able to allow heat and moisture from the iron to pass through. Materials like Teflon and 100% organic cotton fabric are recommended. Go for one with reflective properties like silicon-coated ones or purchase Insul-bright from Amazon. This will be placed on the board surface, and then covered with the new cover.
Making The Ironing Board Cover
What are the steps involved in making the ironing board cover?
1. Create your ironing board cover pattern.
2. Cut out the fabric.
3. Mark the center of the fabric.
4. Create a casing for the elastic or drawstring cord.
5. Insert the elastic or drawstring cord.
6. Attach a stopper.
7. Cover the ironing board.
8. Secure your new cover over the ironing board.
Step 1: Create Your Ironing Board Cover Pattern
If you are new to this, chances are, you don’t know how to create an ironing board cover pattern from scratch. Well, no worries, you can simply download a ready-made one from online sites.
For this, however, you would need to put your board measurements into consideration and tweak accordingly when using such patterns.
An alternative to this is to create a quick and easy pattern by yourself.
How can you create your ironing board cover pattern?
To create your ironing board pattern by yourself, do the following:
1. Simply lay your pattern tracing paper flat on the floor and then turn the ironing board you wish to cover upside down onto it carefully, you don’t want to injure yourself in the process.
2. Use a marker to mark points around it, making sure to leave extra space, about 2 to 3 inches, on the sides. Your measuring tape or ruler comes in handy here. Then join the marked points to trace out the shape.
3. Remove the ironing board and cut out the shape you just traced out. This is the pattern you’ll use to create your new ironing board cover.
You can also use the old ironing board cover to trace out a pattern instead. Just remove it, place on the pattern paper, and trace out the shape as we did, using the ironing board. Easy peasy!
Step 2: Cut Out The Fabric
Before you cut, ensure that your fabric is well prepared beforehand by ironing out the wrinkles to smoothen it.
Then lay it flat on the floor, place the pattern you just traced out over it, and secure in place with pins.
Carefully cut out the fabric, using the pattern as a guide. If you wish to use a double layer of fabric, then fold the material into 2 before cutting out.
For double-layer fabric, once done cutting out, sew the edges together around the perimeter before doing any further work on it. This will help to prevent the fabric pieces from shifting around.

Step 3. Mark The Center Of The Fabric
Measure the length of the whole fabric and note the middle part. Mark this spot, we will come back to it later.
Step 4. Create A Casing For The Elastic or Draw String Cord
Place one end of bias binding tape against the edge of the new cover fabric. The right sides of the binding and fabric must be facing each other. Also, remember to open the binding tape up first before doing so.
Pin the binding into place on to the fabric and then sew around the perimeter of the fabric, starting just above the middle spot marked in Step 3 above. Once you get back to that point, leave some space, and stop sewing.
Then turn in the other end of the bias tape, such that the wrong side faces the wrong side of the fabric and sew down, making sure that you leave enough space in the middle to pass the elastic or drawstring cord through.
Some people find this tedious and choose to skip the use of a bias tape totally, and just fold the fabric edges in and sew down instead to create a casing.
If you’re using this method, fold down the edges about 1/4 inches and use an iron to press down. Then fold in about 3/4 inches again and then sew down. Remember to skip sewing at the marked spot in the middle of the fabric.
Step 5: Insert The Elastic or Draw String Cord
Whatever your choice of material to secure and make your ironing board cover well fitted, insert it into the casing you just made with the aid of a bodkin or safety pin through the space marked earlier in the middle of the fabric.
How do you insert a drawstring into your ironing board cover?
Tie one end of the cord onto the bodkin or pin it with the safety pin and close it. Then insert the tied end, using the safety pin or bodkin to guide your way through, till it comes out on the other open end.
Step 6: Attach a Stopper
To prevent the cord from slipping into the casing completely and getting lost in there, attach a plastic stopper or buckle at the loose ends. You can also improvise by sewing buttons on to the ends.

Step 7: Cover The Ironing Board
Remove the old ironing board cover and slip the new one on to it. Smoothen and adjust it with your hands and pull the cording to fit the cover snugly on the board.
You might also choose to keep the old cover on to serve as an extra layer of padding or place a layer of foam, felt lining, cotton batting or Insul-bright on it (this is optional, only if you want to) before placing the new cover you just made on top. Make sure that the padding material is cut to fit over the ironing board.
Step 8: Secure Your New Cover Over The Ironing Board
Once you are sure that the ironing board cover is well fitted on the board, tie both ends of the cord together firmly. If the cord is too long, you might want to cut off the excess and then tie up the remaining part.
For extra security, you can also sew elastic bands on to opposite sides of the ironing board cover at the bottom and attach a buckle at the ends. Mind you, a button and buttonhole will also work if you would rather not use a button.
With this, you can pull both bands across the width of the ironing board and buckle up or button up underneath, as the case may be.
Congratulations! You have just made an ironing board cover.
Video: How to Make An Easy Ironing Board Cover
You can also check out this video to learn more:
For more DIY ironing board ideas, check these articles:
- How To Make A Tabletop Ironing Board in 8 Steps
- How to Make a Quilting Ironing Board in 3 Ways
- How To Make An Ironing Board Pad in 8 Steps
- How to Make a Portable Ironing Board — A Guide
- Where to Buy Ironing Board Covers — A Guide
- How To Use An Ironing Board Like a Pro
Quick Recap
Ironing board covers are a necessary component of an ironing board. An ironing board cover serves both protective and aesthetic functions by protecting clothes and the ironing board from scorch marks and stains, while also livening up your ironing space.
You might want to learn how to make a DIY ironing board cover in order to replace the old and worn-out one or just as a fun sewing project. Either way, the process of making one is quite simple.
First, gather your materials and create a pattern using your ironing board itself or its old cover. Trace out and cut out the pattern on paper, before using it as a guide to cut the fabric. Then sew bias binding along the edge of the fabric to create a casing for the elastic or drawstring cord which will be used for fitting and securing the ironing board cover in place. You can also sew down the fabric edges instead of attaching a bias binding.
Once done, insert the elastic or drawstring cord with the aid of a bodkin or safety pin. Then pull through to the end and secure the ends with a stopper. Once done, slip the new ironing board cover on to the ironing board, adjust accordingly to fit and secure in place.
Now you are good to go!
If you insist on a ready-made cover because you don’t think you have the time for a DIY project then you can check out this ironing board cover with padding.

Would you prefer to buy a new ironing board cover instead of making a DIY one? Then you will enjoy this article on where to buy good quality ironing board cover.
Moreso, if you want to try more DIY ironing projects, you can check out this guide on how to make an ironing board pad.
How to Make an Ironing Board Cover Like a Pro — Related FAQs
What is the best fabric for an ironing board cover?
The best fabrics for an ironing board cover are natural fabrics like cotton and wool. This is because of the following characteristics:
1. They are heat resistant and can withstand high temperatures.
2. Cotton fibers are not easily melted by iron burns. Instead, they are flattened and can be restored by soaking in water for 24 hours. Wools, however, can be melted when burnt during ironing.
3. They are breathable and therefore will not trap the heat and steam emanating from the iron.
4. They do not easily lose their color or stain the fabric being ironed when they are heated up.
What kind of batting do you use for an ironing board?
You can use cotton fabric batting such as old towels, wool blankets, polyester batting, or a commercial batting such as Insul-Bright.
Cotton battings such as towels, woven, and multi-layered fabrics are the best batting to use since they can absorb a high amount of moisture and heat.
Woolen batting provides a lot of cushioning and can absorb a lot of heat but not moisture. However, they offer great protection to the ironing surface.
Insul-Bright possesses qualities that make it reflect heat back to the ironed fabric, which makes ironing more effective. Polyester batting is not heat-resistant. Therefore, look out for polyester batting interwoven with cotton fibers.
How often should you change the ironing board cover?
You should change your ironing board cover every 7 years. This is mainly applicable if you iron about 4-6 garments every day.
However, if you iron a lot of clothes every day, you have to look at the condition of the ironing board cover in order to decide.
If your ironing board is badly burnt on several spots, torn, creased badly, or is beginning to leave stains and fibers on your garments, it is time to change it.
If the batting of your ironing board cover is still in good condition, you can buy a good cotton fabric and replace the top layer.
How do you attach an ironing board cover?
To attach an ironing board, do the following:
1. Clean the ironing board frame.
2. Lay the padding on the ironing board if it is not sewn together with the ironing board cover.
3. Hold it to the ironing board frame with staples using a staple gun.
4. Place the ironing board on the ironing board and straighten it out with your hands.
5. Tighten the ironing board cover and hold it in place with a fastener such as buttons, Velcro straps, bracer clips, or drawstrings.
How do you make an ironing tabletop board?
To make an ironing tabletop board, you will need plywood; an old towel or foam for padding; cotton fabric for the cover; and nail or staple gun.
Cut the wood and the padding into the desired size. Glue, staple, or hold them together using nails. Place the cotton fabric on the floor with the inner side facing up. The fabric should be wide enough to cover the whole board.
Place the padding and wood on the cotton fabric and fold it around the wood. You can fold it around the wood twice if you want the fabric to cling tightly to the wood. Pull the fabric tight and use nails or staples to hold it to the wood.
How do you measure an ironing board for a new cover?
To measure an ironing board for a new cover, do the following:
1. Remove the old ironing board cover.
2. Set up the ironing board by straightening the stands.
3. Measure the length of the iron board. Do not measure the iron rest.
4. Measure the width of the widest part of the ironing board.
5. Measure the width of the narrowest part of the ironing board.
6. Measure the thickness of the ironing board.
7. You can add some inches to the measurements taken. This is to make sure that the fabric to be used as the cover will be in excess instead of not being enough.
Is Insulbrite washable?
The materials used in making Insul-Bright make it totally washable. It may crease after washing but it will smoothen over time. It cannot be broken down when exposed to water and a cloth dryer.
Although the materials used and the design of Insul-Bright makes it durable, it is not a good idea to wring it after washing.
Insul-Bright is an insulating and padding material made by punching polyester fibers that are hollow through a metalized film. The hollow fibers do not allow heat transfer by conduction while the metalized film prevents heat transfer by radiation.